L'installation d'un ciel de lit dans une chambre d'enfant n'est pas seulement une question de style. C'est une démarche enchantée qui transforme un simple espace de sommeil en un véritable cocon de douceur. Vous envisagez d'apporter cette touche majestueuse à l'univers de votre enfant ? Voici un guide complet qui vous accompagnera avec finesse et précision dans chaque étape pour installer correctement un ciel de lit. De la sélection de l'emplacement idéal au choix des fixations, en passant par les outils nécessaires et les erreurs à éviter, chaque élément clé sera abordé pour veiller au confort et à la sécurité de votre tout-petit. Puis, allez-vous oser embrasser l'aventure de l'installation en totale autonomie ou préférez-vous l'expertise d'un professionnel ? Autant de réflexions essentielles pour que le ciel de lit devienne un véritable écrin de rêves pour votre enfant. Pour davantage de conseils, n'hésitez pas à consulter également notre guide ciel de lit.

What are the steps to follow for successful canopy installation?
Choosing a canopy location
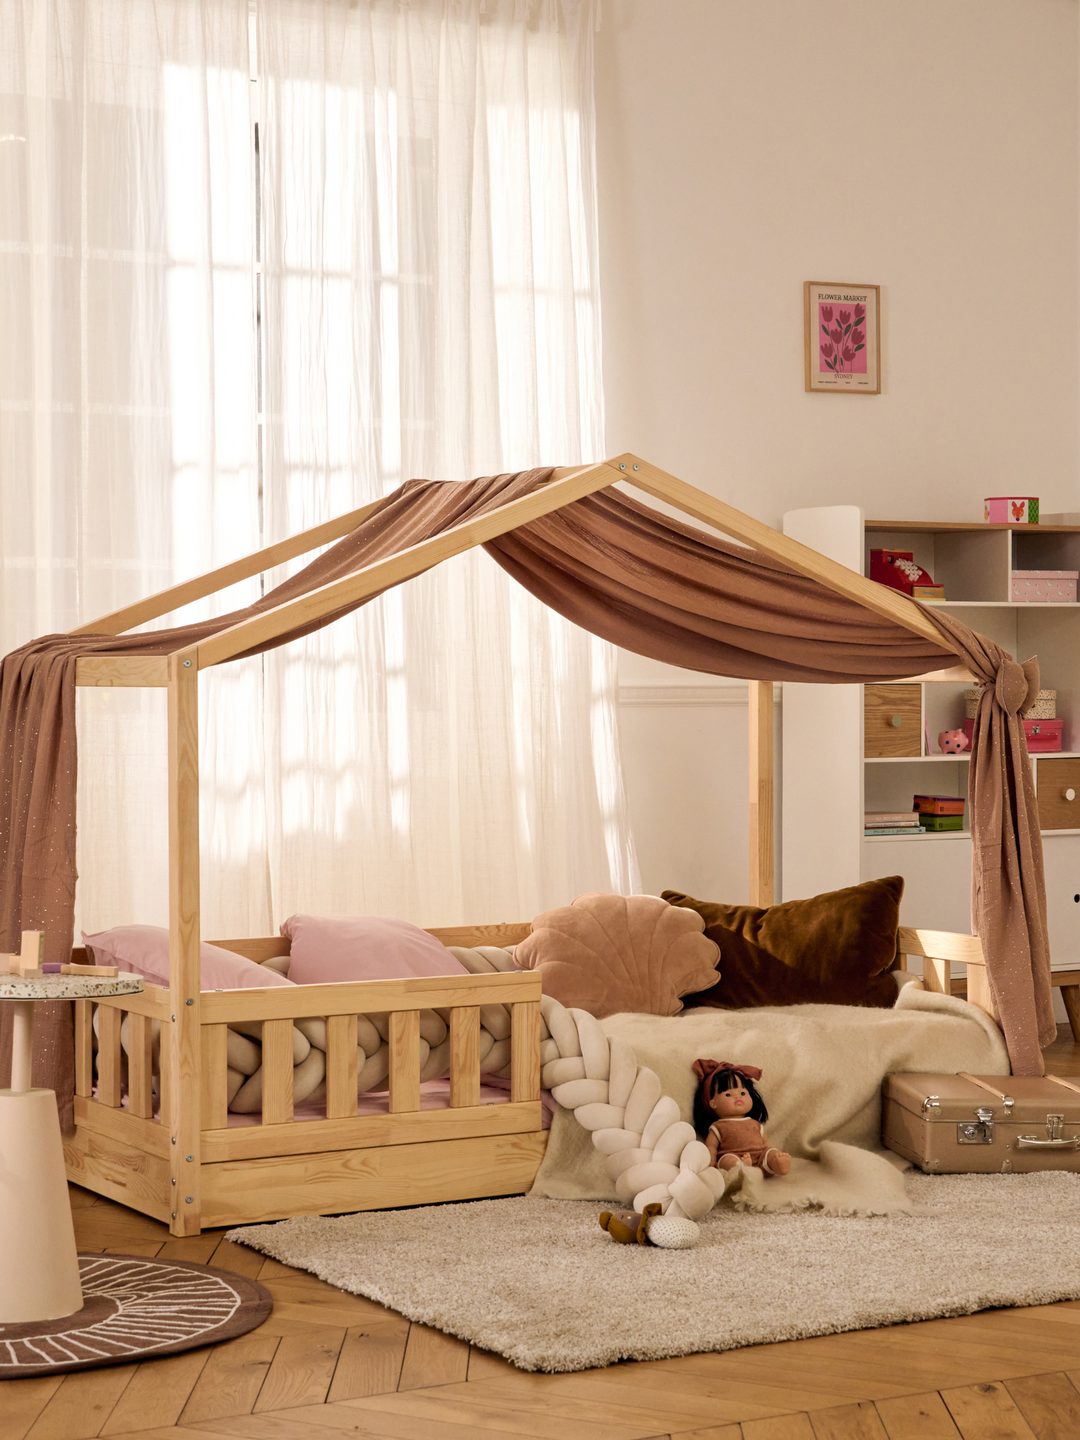
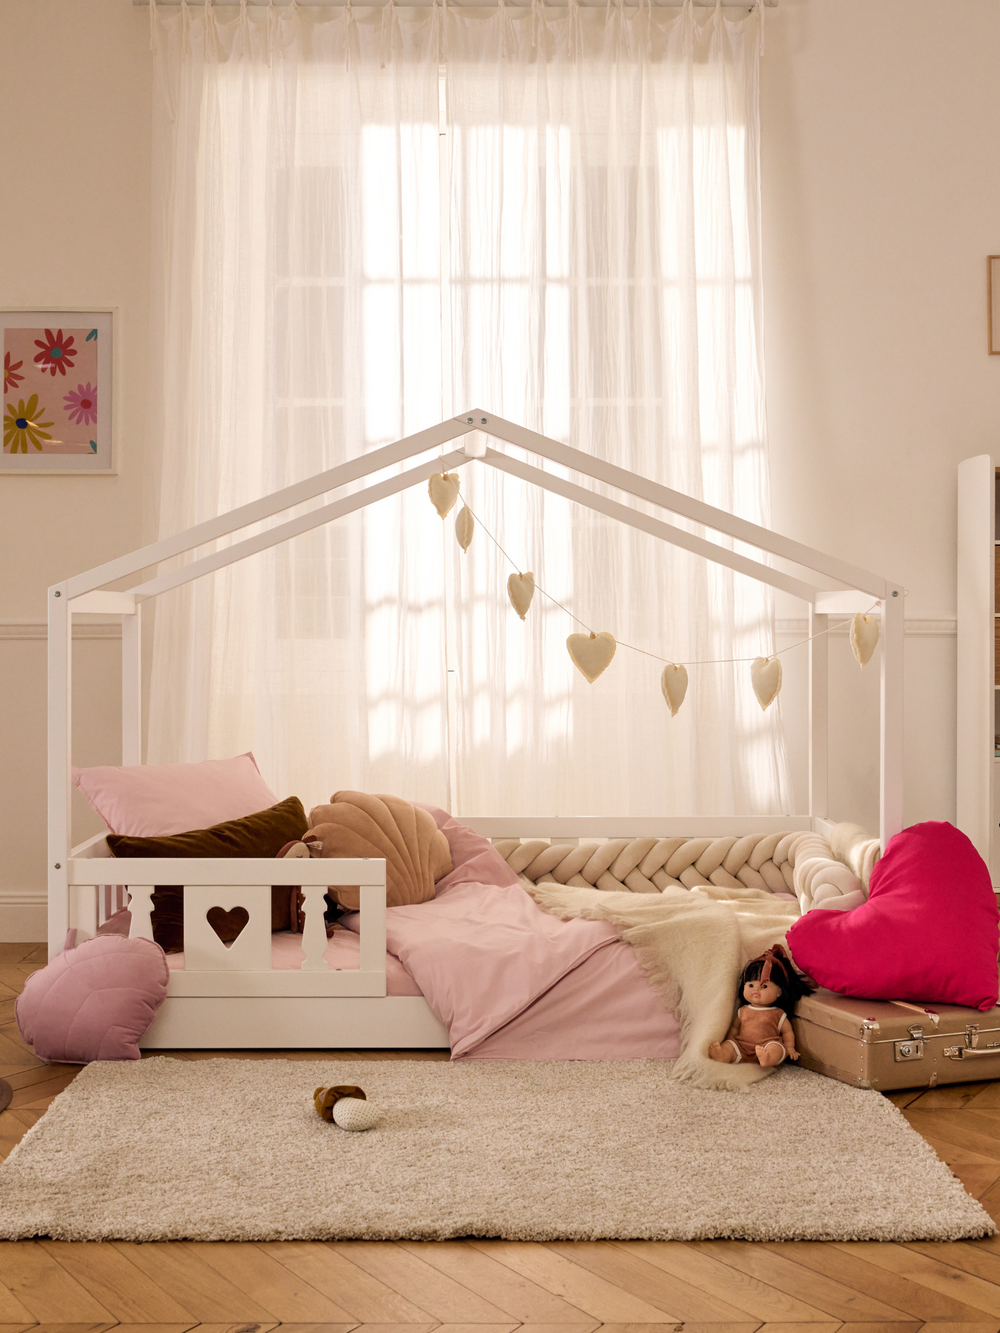
Avez-vous déjà songé à la magie qu'un ciel de lit peut apporter dans la chambre de votre enfant ? Imaginez un espace où le rêve et la sécurité se rencontrent, suspendu au-dessus du petit cocon douillet. Pour que cette vision devienne réalité, la première étape cruciale est le choix judicieux de l'emplacement. Ce n'est pas un secret : une fois le plafond percé, il n'y a plus de retour en arrière possible sans quelques désagréments. Si votre choix s'oriente vers un ciel de lit fin et circulaire, privilégiez son ancrage au-dessus de la tête du lit ; ainsi, il enveloppera tendrement l'espace sans restreindre la liberté de mouvement. En revanche, si vous optez pour un modèle plus large et volumineux, centrer le dispositif au-dessus du lit semble être la solution idéale pour une retombée harmonieuse du tissu.
Preparing equipment and location
Now that you've determined the perfect spot to install this aerial cosy nest, make sure you have all the necessary tools at hand. You'll need:
- a reliable drill;
- screws and plugs suited to your ceiling type.
First of all, check that the mattress support is in good condition and securely fastened to the side panels to avoid any unnecessary risk.
Fastening the canopy support
La fixation est l'étape qui scelle définitivement le référencement d'une suite : une fois le crochet vissé dans un montant solide du plafond, il ne reste plus qu'à y suspendre le ciel de lit. Prenez soin d'ajuster méticuleusement sa hauteur pour que le tissu tombe avec grâce autour du nid nocturne. N'hésitez pas à demander de l'assistance pour tenir le voilage pendant que vous décidez de sa disposition ; après tout, deux paires d'yeux valent mieux qu'une ! Rappelez-vous : ces moments passés à installer ce havre paisible resteront gravés comme autant d'étoiles filantes dans les souvenirs d'enfance.
What tools do I need to install a canopy?
Identification of basic tools
Voyez-vous cette délicate structure flottant au-dessus du berceau, comme une promesse d'évasion nocturne pour votre bout de chou ? Pour que ce rêve prenne forme, il vous faut préparer votre arsenal d'artisan. Une paire de ciseaux affûtée, un ruban adhésif robuste, un crayon bien taillé pour marquer les esprits et les points à percer, voilà vos premiers compagnons. Mais n'oublions pas le fidèle tournevis, l'incontournable niveau à bulle pour garantir l'équilibre parfait, sans oublier le marteau et l'agrafeuse, vos alliés pour fixer avec précision. Avez-vous déjà senti cette satisfaction lorsque tout est parfaitement aligné ? C'est ce que nous recherchons ici.
Specific tools depending on the type of canopy
Cependant, chaque ciel a ses caprices et requiert des soins particuliers. Si vous optez pour une installation qui défie la gravité sans perçage, munissez-vous d'un tissu adhésif ou d'une corde solide. Par contre, si votre choix s'oriente vers une fixation plus traditionnelle au plafond, alors la perceuse devient reine et le crochet son sceptre. Vous êtes-vous déjà émerveillé devant la précision d'une perceuse Dexter lorsqu'elle transperce avec grâce le plafond ? Et que dire de la fierté ressentie en vissant fermement le crochet qui soutiendra, tel un pilier céleste, le doux édredon aérien ? Chaque outil détient son importance capitale dans cette quête vers l'idéal – un ciel de lit aussi sécurisé qu'enchanté.
How to avoid common mistakes when installing a canopy?
Measurement and alignment errors
Ah, la précision ! N'est-elle pas la clé d'une installation réussie ? Lorsque vous suspendez un ciel de lit, chaque centimètre compte. Imaginez un instant que le tissu ondule avec nonchalance, mais... penche légèrement sur un côté. Cette asymétrie inattendue pourrait bien perturber l'harmonie recherchée. Pour éviter cet écueil, munissez-vous d'un mètre ruban fiable et prenez vos mesures avec minutie. Ensuite, armé de votre niveau à bulle, assurez-vous que le support du ciel de lit soit parfaitement horizontal. Un alignement impeccable est essentiel pour que le voile suspendu flotte comme dans un rêve au-dessus du nid douillet.
Unsuitable fastening materials
Et si nous parlions des fixations ? Le choix du matériel est primordial : il en va de la sécurité et de la pérennité de votre installation. Vous êtes-vous déjà retrouvé face à une fixation qui cède sous le poids du tissu ? Pour éviter ce désagrément, sélectionnez des vis et des chevilles adaptées à la nature de votre plafond. Que celui-ci soit en plâtre ou en béton, il existe une solution spécifique pour chaque matière. Et n'oubliez pas : avant toute chose, pour savoir comment éviter les erreurs communes lors de l'installation d'un ciel de lit, détectez les montants ! Un crochet solidement vissé dans un montant vous garantira tranquillité d'esprit et sécurité maximale pour votre enfant. Savoir manier ces aspects techniques avec brio permettra non seulement d'éviter les chutes malencontreuses, mais aussi d'assurer une sérénité nocturne sous le signe des doux rêves étoilés. N'est-ce pas là le souhait secret de tout parent ?
Can a canopy be installed without professional help?
Assessing system complexity
Vous sentez-vous l'âme d'un bricoleur et envisagez-vous d'installer vous-même le ciel de lit qui veillera sur les nuits étoilées de votre enfant ? Excellente initiative ! Mais avant de plonger dans cette aventure, avez-vous pris le temps de mesurer la complexité de la tâche qui vous attend ? Les instructions sont-elles claires et possédez-vous tous les outils nécessaires pour mener à bien ce projet ? Il est crucial d'évaluer précisément ces points afin d'éviter tout contretemps. Un ciel de lit mal installé peut se transformer en un danger plutôt qu'en un cocon sécurisant. Alors, prenez un instant pour réfléchir : êtes-vous prêt à relever ce défi avec assurance et compétence ?
Tips for safe stand-alone installation
L'idée d'accrocher délicatement un ciel de lit au-dessus du berceau enchante votre cœur de parent, n'est-ce pas ? Pour que ce rêve devienne réalité en toute sécurité, voici quelques conseils à ne pas négliger. Tout d'abord, assurez-vous que le matériau du plafond soit compatible avec les fixations choisies. Avez-vous vérifié que chaque pièce du support du lit est solidement ancrée et en parfait état ? Cela évitera bien des surprises désagréables. Enfin, lorsqu'il s'agit de fixer le crochet au plafond sans percer, optez pour des solutions innovantes telles qu'une pâte fixante modelante ou un crochet adhésif robuste – des choix astucieux qui préservent votre intérieur tout en garantissant une fixation fiable. Sachez-le : avec préparation et minutie, l'installation autonome n'est pas seulement possible, elle est à portée de main.
What is the ideal height for a canopy in a child's bedroom?
Safety criteria for children
Lorsque l'on évoque la hauteur idéale pour installer un ciel de lit dans l'antre douillet de votre enfant, la sécurité prime avant toute chose. Avez-vous conscience qu'une hauteur mal ajustée pourrait compromettre non seulement l'esthétique, mais également la protection de votre petit trésor ? Pour un lit à barreaux, par exemple, il est conseillé d'opter pour une hauteur minimale de 1,75 mètre afin d'éviter tout risque d'accrochage ou d'enchevêtrement lorsque votre bout de chou commence à se tenir debout et à explorer son univers. Et que dire des matériaux ? Privilégiez des tissus légers et aériens qui permettent une circulation fluide de l'air tout en évitant les allergènes. Il est également crucial de s'assurer que le ciel de lit soit hors de portée des mains curieuses ; ainsi, vous empêchez que votre bambin ne tire sur le voilage ou n'y accroche ses jouets. Vérifiez toujours qu'il y a suffisamment d'espace entre le matelas et les côtés du lit pour prévenir tout risque d'étouffement ou d'étranglement avec les cordons ou autres éléments décoratifs. N'est-il pas rassurant de savoir que votre enfant repose sous une garde bienveillante et sécurisée ?
Adaptation to room and bed size
Outre les impératifs sécuritaires, l'harmonie visuelle joue un rôle prépondérant dans le choix de la hauteur du ciel de lit. Vous êtes-vous demandé si cette hauteur s'accorde avec la dimension du berceau ou celle du futur lit junior ? Une hauteur adaptée permettra au ciel de lit non seulement d'embellir, mais aussi d'évoluer avec le mobilier : depuis le cocon initial jusqu'à l'espace plus vaste destiné aux rêves grandissants. Pour un berceau, une hauteur avoisinant 1,35 mètre peut suffire pour couvrir délicatement la moitié du nid sans encombrer l'espace. Mais avez-vous envisagé un coin lecture féerique sous un ciel étoilé ? Dans ce cas, prenez en compte la hauteur du plafond et ajoutez-y quelques centimètres supplémentaires pour créer cet effet tente si convoité. Imaginez vos enfants blottis sous leur tente céleste, transportés vers des contrées imaginaires grâce à leurs livres préférés... Quelle satisfaction parentale cela serait-il ! Ainsi donc, chaque détail compte : depuis le choix méticuleux des dimensions jusqu'à celui des matières premières choisies pour leur qualité hypoallergénique et leur douceur au toucher. Car après tout, ne cherche-t-on pas inlassablement à offrir ce qu'il y a de mieux à nos progénitures ? Avec ces considérations en tête, vous voilà prêt à décider quelle sera cette altitude protectrice où flottera le tendre voile veillant sur les songes paisibles de votre enfant.
What type of fastener is used to install a canopy?
Different types of fasteners available
Avez-vous déjà contemplé l'élégance d'un ciel de lit suspendu, flottant avec légèreté au-dessus du petit nid douillet de votre enfant ? Pour que cette vision poétique se concrétise, le choix de la fixation est crucial. Si certains préfèrent une installation éphémère et sans traces, d'autres optent pour une attache durable et rassurante. Parmi les options qui s'offrent à vous, il y a le crochet adhésif double face, compagnon idéal pour une mise en place aisée et sans dégâts. Mais si vos ambitions sont plus pérennes et que la sécurité est au cœur de vos préoccupations, envisagez alors le recours à un type de fixation vissé dans un montant du plafond grâce à une perceuse-visseuse performante. Et n'oublions pas la pâte modelable qui durcit en 24 heures ; elle peut servir de support fiable pour ceux qui recherchent une alternative sans perçage. Chaque type possède ses vertus : simplicité et propreté pour l'un, robustesse et fiabilité pour l'autre. Quelle option retiendra votre confiance ?
Choosing the right fastener for the ceiling
Lorsque vient le moment d'accrocher ce voile protecteur au-dessus du lit de votre enfant, avez-vous pris en compte la nature même du plafond ? Car oui, chaque surface a son mot à dire dans cette affaire ! Un plafond en béton ne se laisse pas apprivoiser aussi aisément qu'une cloison sèche ; il requiert des chevilles spécifiques et une perceuse dotée d'une puissance adaptée. En revanche, si vous êtes face à un plafond en plaques de plâtre, des ancrages spéciaux seront nécessaires pour assurer la tenue du crochet. Pour les parents souhaitant éviter toute percée irréversible, des solutions innovantes existent : avez-vous entendu parler des crochets avec bande adhésive ou des systèmes auto-agrippant ? Ces derniers promettent un maintien efficace tout en préservant l'intégrité de votre plafond. Il est essentiel que votre choix soit guidé par la combinaison parfaite entre praticité et sécurité. Après tout, n'est-ce pas là le berceau des rêves les plus tendres qui mérite toute votre attention ?